Chain
When the very first bicycles were being developed, simplicity was king. We are talking about Scotsmen scooting about on wooden frames with wooden wheels and wooden forks. This soon developed into the first real bicycles, where rather than pushing along with your feet on the ground cranks were fitted directly to the wheel of the “ordinary” (or penny farthing).
Not happy with the slightest bump causing them to fly over the bars onto their face from 10 feet up, designers searched for a way to make a “safety” bicycle. The key to this was the invention of the roller chain, which allowed the cranks to be moved off the wheel itself and therefore the rider too.
Since then a lot of lycra-clad, leg-shaving freaks have tinkered around with the chain quite a bit to get gears but essentially we are riding much the same technology today.
For some reason a lot of BMXers have problems with their chain. Some would say that it’s the way we smash it against things. But even if you look after your chain and refrain from mashing it into every wall you come across, it can still let you down badly.
Chains have a great sense of humour. What they will do is wait patiently for you to really crank hard at something, then they will suddenly snap and watch as you throw yourself into the front wheel of the bike. Ideally this should be in a crowded area or busy main road. So this month let’s look at the chain.
ALL bicycle chains are made up of inner and outer plates. OK so not all chains, the Shadow interlock chain is slightly different in that it is made up of “cranked” links but just ignore that for a minute and I am sure you will be able to work out the differences for yourself.
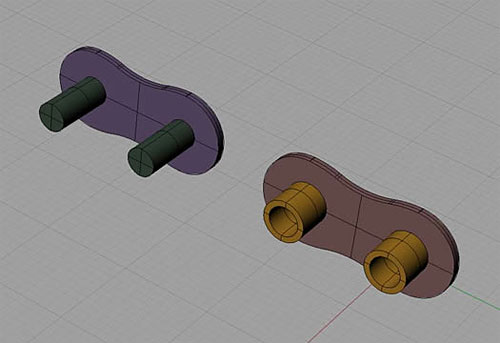
Two Inner plates are typically fixed together in a pair by two little hollow cylinders (though often these cylinders are formed by squidging the middle of the link inwards so it is one piece). These cylinders are a tight fit in the side plates so that this little assembly holds itself together. Around the outside of these hollow cylinders run rollers. Basically just another slightly larger hollow cylinder that is free to spin on the first.
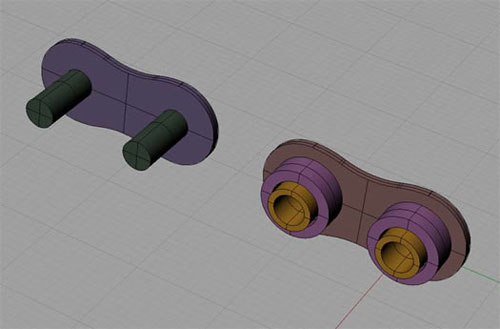
Outer plates are also fixed together in pairs but by a thinner solid pin than the inner link. Again this pin is a tight fit in the plates to hold it all together.
But these pins are slid through the hollow pins of the inner links to link all the links together.
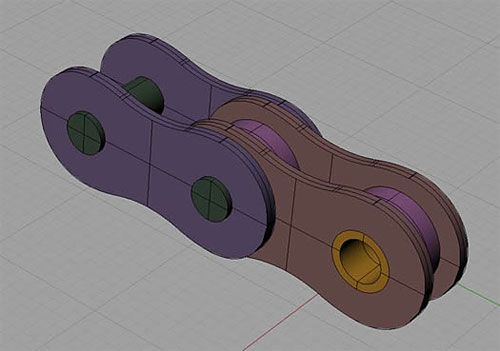
As long as there are gaps for all these things to move freely then everything should be peachy.
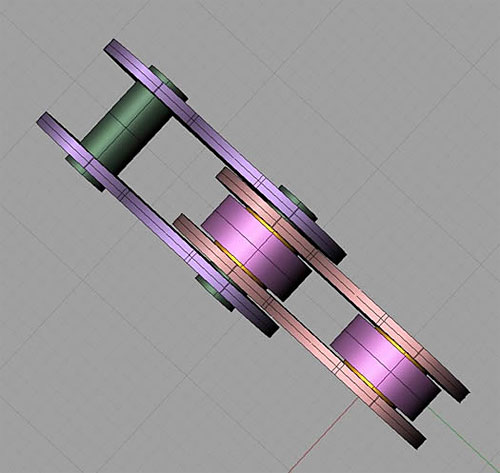
Yes. This IS all very obvious if you look at it but have you ever really bothered? You have? Oh. Sorry…
Anyway, once you think about it this way, it is easy to understand the common problems.
One of the most common is the “stiff link”. If you crank the chain round some of the links may not pull straight on the bottom straight run of chain. This is caused by the outer links being pinned too tightly around the inner.
The key to fixing or preventing this is knowing how to use a chain breaker correctly. When putting a chain together there are two sets of baffles to support the chain. When you put the chain in the furthest over position then you push the pin against the far plate. This helps it get started without simply shoving the plate out of the way. But once the pin is nearly all the way back in it will be making the link bind up. To stop this you then move the chain to the nearer position to the handle, and add that last quarter turn or so. These nearer baffles support the nearside plates so that as the pin moves that last bit it takes the far plate with it, thus opening the width slightly and making the room for the chain to flex cleanly.
Assuming you can get your chain together cleanly without pushing the pin too far over or making a stiff link then the biggest problem is getting a good “chain-line”.
The chain really needs to run straight back along the bike. The sprocket and freewheel are both aligned exactly parallel to the frame but if they aren’t offset from the centre line the same amount then the chain will have to bend sideways as it comes off the sprockets. If there is any significant bend then, only the sideplates on the outside of the bend can transmit the force. This can effectively double the load on the chain and greatly increases the chances of it breaking. This misalignment also makes the chain try to work itself apart as you pedal which doesn’t help.
Most people just eye this up to check the line, but with the chainstay snaking through your field of vision and the bulk of the tyre on one side this technique isnt very reliable. Mush better is simply to measure everything.
Your whole bike should be symetrical so if you measure the width of your hub, divide by two and subtract the distance the sprocket is from the dropout. Then this dimension is how far your chain should be from the frame centre-line.
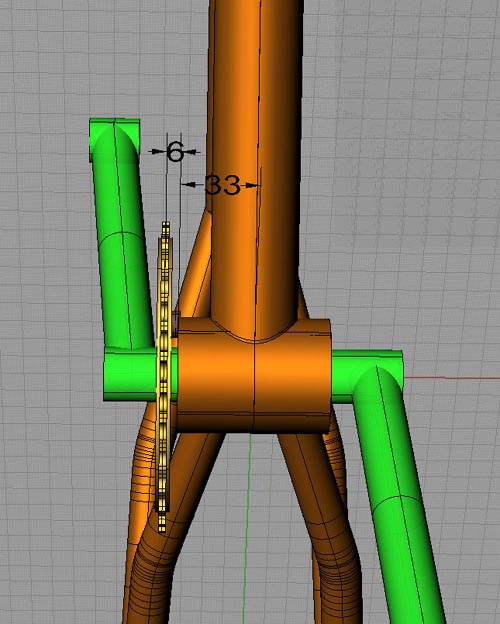
If you next measure the bottom bracket shell width, divide by two, and add the distance to the front sprocket then this SHOULD be the same.
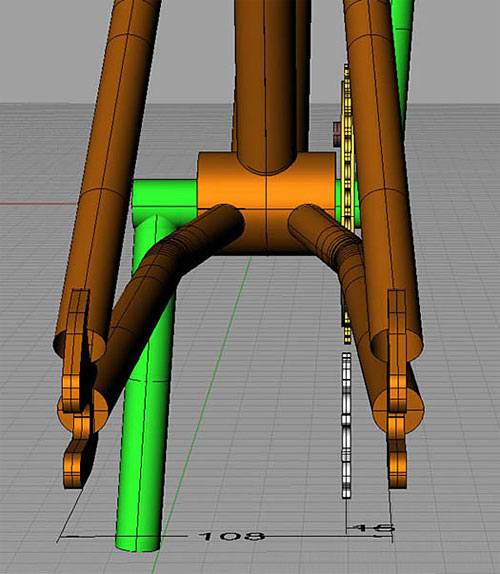
Remember to measure to the centre-line of the teeth for consistency.
The numbers above are just EXAMPLES, you dont have to have these exact numbers.
In this case you can see that at the back we have:
108/2 = 54
54 – 15 = 39
Then at the front we have:
66/2 = 33
33 + 6 = 39
So everything is as it should be.
Obviously if your frame is bent then these numbers are pretty meaningless but you can look at tech column 83 to help you check for that.
One of the least common questions about chains is how often should you lubricate it and what with? It is quite reassuring that this question isn’t that common, because for BMX, lubing the chain is pretty unimportant. Most chains will come nicely pre-oiled, all you need to do is bung them on and go ride. Adding extra oil is all very well if you are a road racer riding hundreds of miles but for bums like us it really isn’t that important.
Having said that, if you ride in the rain or wet quite a lot then the oil inside the chain will slowly wash out and leave your chain dry and inefficient. Ideally we only want lube between the central solid pins and the hollow pins (or bushes), and between the bushes and the rollers. Getting it there, is down to either soaking the chain or dripping a drop of lube on each roller independently. Either way you then need to really clean off the outside of the chain to stop the excess lube attracting all the dust and crap from miles around and gluing it to your drive train.
